Support Forum › Support Forum › GDPR Cookie Compliance › Google Consent v2 Settings – video tutorial
- AuthorPosts
 Moove AgencyFebruary 23, 2022 @ 4:17 pm
There are 4 ways that our plugin supports the GA / GTM Consent natively.
Option 1: Direct integration
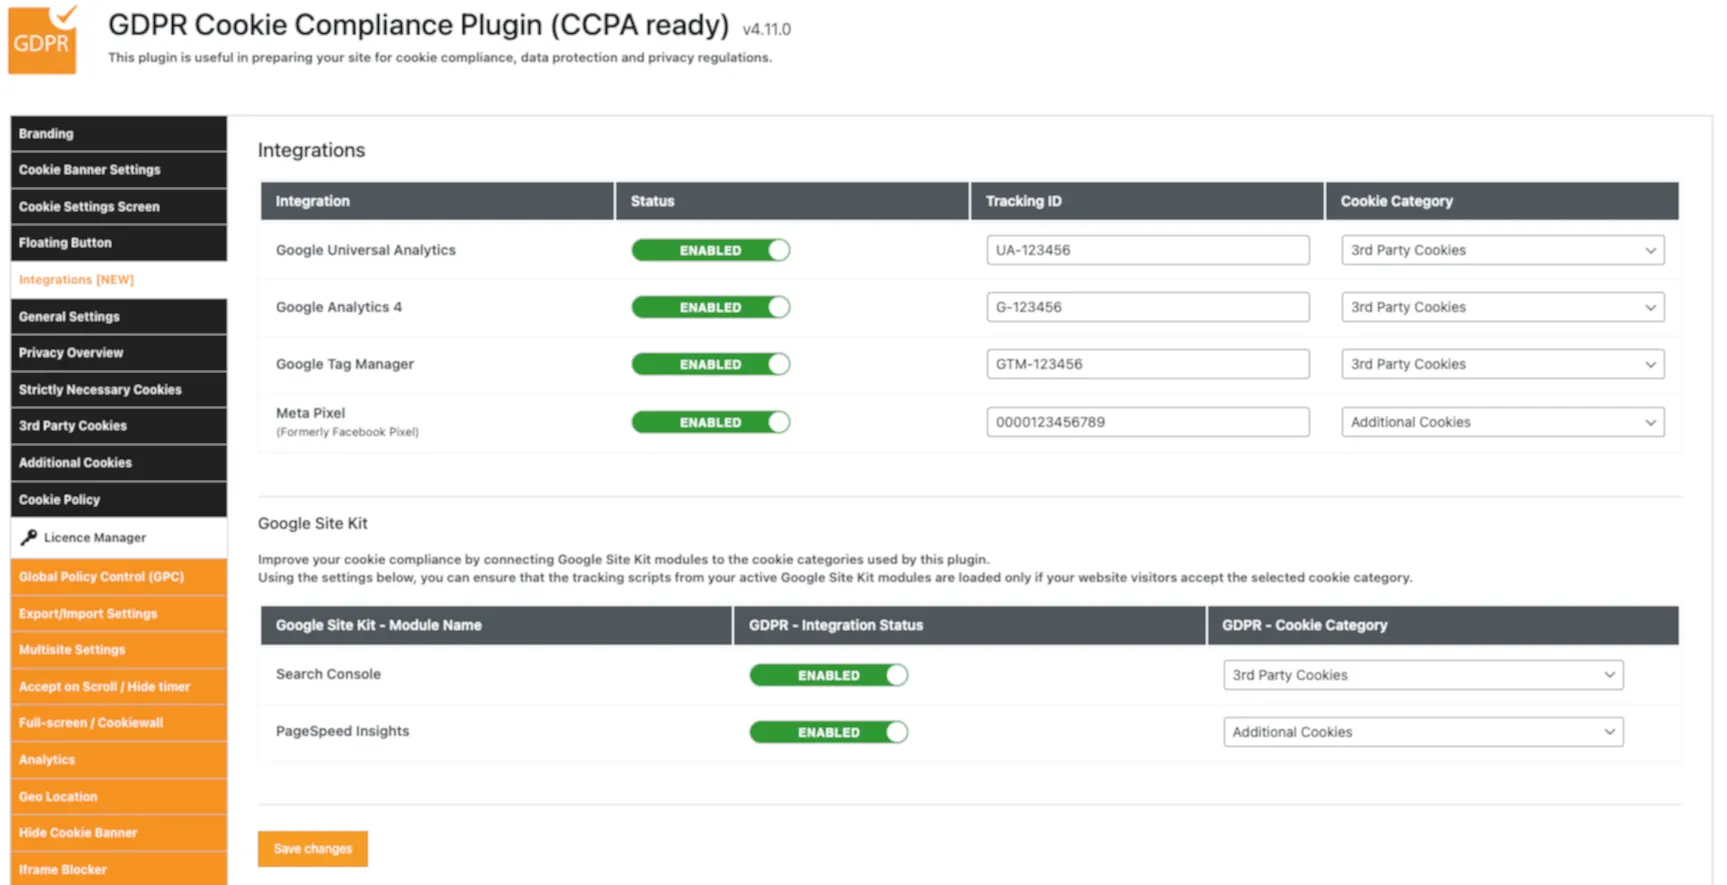
Our plugin has a new feature called “Integrations” that allows you to insert your GA/GTM or Facebook Pixel ID directly into the plugin.
This is the easiest way to insert GA/GTM scripts into our plugin. Using the settings in the Integrations tab, you can ensure that the tracking scripts will be loaded only if your website visitors accept the selected cookie category.
More details in our video tutorial:
Please ensure that you if you use this method, you also remove any hard-coded GA/GTM or Facebook/Meta Pixel scripts from your website theme or other plugins (including any other parts of this plugin) to prevent duplicate activation of the same scripts.
Option 2: Google Site Kit integration
Our plugin also supports the Google Site Kit natively as part of our premium add-on.
If you are a premium user and your Google Site Kit plugin is active, you will see the ‘Google Site Kit’ table listed in the ‘Integrations‘ tab.
Here is a short video tutorial:
Option 3: GTM / Javascript consent variables
Our plugin has the following 3 consent variables implemented by default for each cookie category:
gdpr_consent__strict=> values: true or falsegdpr_consent__thirdparty=> values: true or falsegdpr_consent__advanced=> values: true or falseYou also have a single variable that includes all categories that the user accepted:
gdpr_consent__cookies=> values: strict|thirdparty|advanced or strict|thirdparty or strict|advancedThese consent variables can be used to configure your Google Tag Manager or other tools.
More details in the below video tutorial:
Option 4: Two step GTM integration
Step 1: The first part of the script should be hard-coded to your theme
<script>
// Define dataLayer and the gtag function.
window.dataLayer = window.dataLayer || [];
function gtag(){dataLayer.push(arguments);}
// Set default consent to 'denied' as a placeholder
// Determine actual values based on your own requirements
gtag('consent', 'default', {
'ad_storage': 'denied',
'ad_user_data': 'denied',
'ad_personalization': 'denied',
'analytics_storage': 'denied'
});
</script>
<!-- Google Tag Manager -->
<script>(function(w,d,s,l,i){w[l]=w[l]||[];w[l].push({'gtm.start':
new Date().getTime(),event:'gtm.js'});var f=d.getElementsByTagName(s)[0],
j=d.createElement(s),dl=l!='dataLayer'?'&l='+l:'';j.async=true;j.src=
'https://www.googletagmanager.com/gtm.js?id='+i+dl;f.parentNode.insertBefore(j,f);
})(window,document,'script','dataLayer','GTM-XXXXXX');</script>
<!-- End Google Tag Manager -->Step 2: The second part of the snippet which should be added to our GDPR plugin (3rd party or advanced cookies) – this part “updates” the consent
gtag('consent', 'default', {
'ad_storage': 'granted',
'ad_user_data': 'granted',
'ad_personalization': 'granted',
'analytics_storage': 'granted'
});
Option 5: Consent Move v2 – Direct Integration [for advanced users only]
Setup a new Trigger in you GTM with the following setup:
Trigger Type: Custom Event
Event name: cookie_consent_update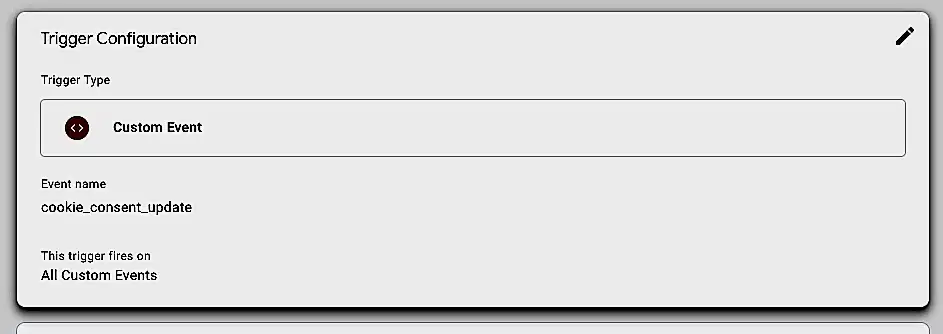
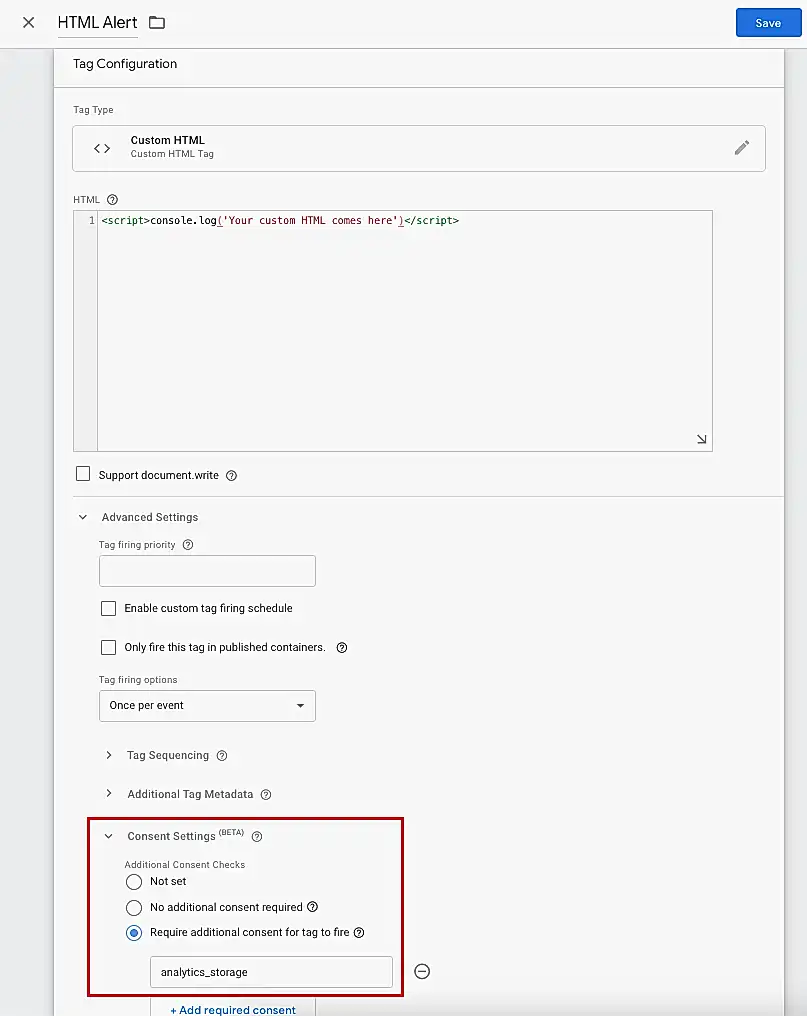
Assign your GTM tags using this new Trigger, and select a consent category from the Consent Settings:
More information
You can read more about the Google Consent Mode here:
If you have any further questions, feel free to raise a new support ticket.
Hope this helps.
- AuthorPosts
The topic ‘Google Consent v2 Settings – video tutorial’ is closed to new replies.